
When it comes to decorating your Christmas tree, nothing feels more special than making your own ornaments. Whether you love the cozy vibe of rustic decor or lean toward a modern, minimalist look, homemade decorations can give your tree a personal and heartfelt touch.
Best of all, they’re fun to create, and you can tailor them to match your unique style. Let’s dive into some creative homemade Christmas tree decoration ideas, each with easy instructions to bring your vision to life.
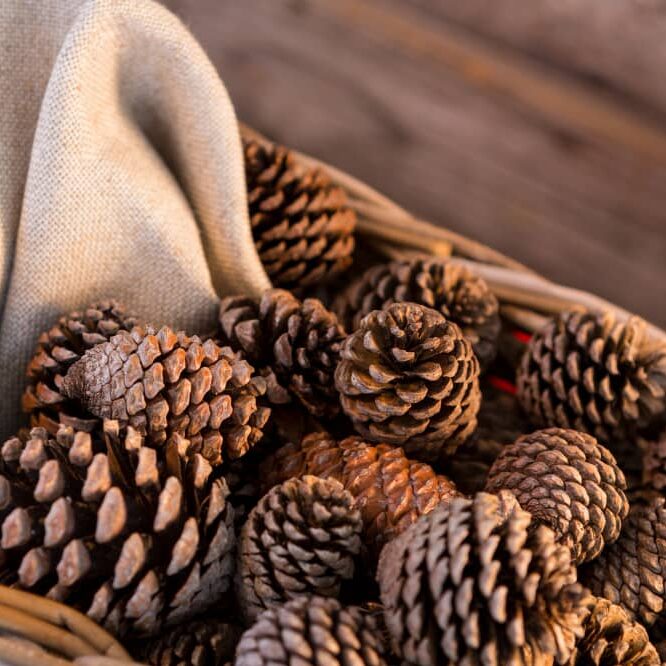
1. Pinecone ornaments
Pinecone ornaments are natural decorations made from pinecones, often enhanced with glitter, paint, or other embellishments. They add a rustic and cozy touch to your Christmas tree.
What you’ll need:
- Pinecones
- White acrylic paint (optional)
- Twine or ribbon
- Hot glue
- Small decorative items like berries or greenery (optional)
How to make them:
- Start by collecting some pinecones (or grab them from a craft store).
- Clean them with soap and water to remove any dirt.
- For a snowy effect, lightly dab the edges with white paint.
- Once dry, glue a piece of twine or ribbon to the top to hang them.
- If you want to get fancy, hot glue some mini berries or leaves at the top for extra flair.
Pinecone Christmas Ornament DIY | Hobby Lobby®
pinecones
glitter
Christmas ribbon

Rustic pinecone ornament
2. Geometric paper ornaments
If you love modern decor, geometric paper ornaments are right up your alley. They’re minimalist, stylish, and surprisingly easy to make.
What You’ll Need:
- Cardstock paper
- Glue
- Scissors
- String or ribbon
- Optional: metallic spray paint or glitter for a glamorous touch
How to Make Them:
- Find a template online for geometric shapes like diamonds or stars.
- Cut the shapes out of cardstock.
- Fold and glue the pieces together to form 3D ornaments.
- Before sealing the last edge, thread a string or ribbon through the top for hanging.
- To make them sparkle, give them a light coat of metallic paint or sprinkle on some glitter.
Paper Geometric shapes for Christmas tree decoration | creative

Cardstock paper
glitter
Christmas ribbon

Geometric paper ornaments
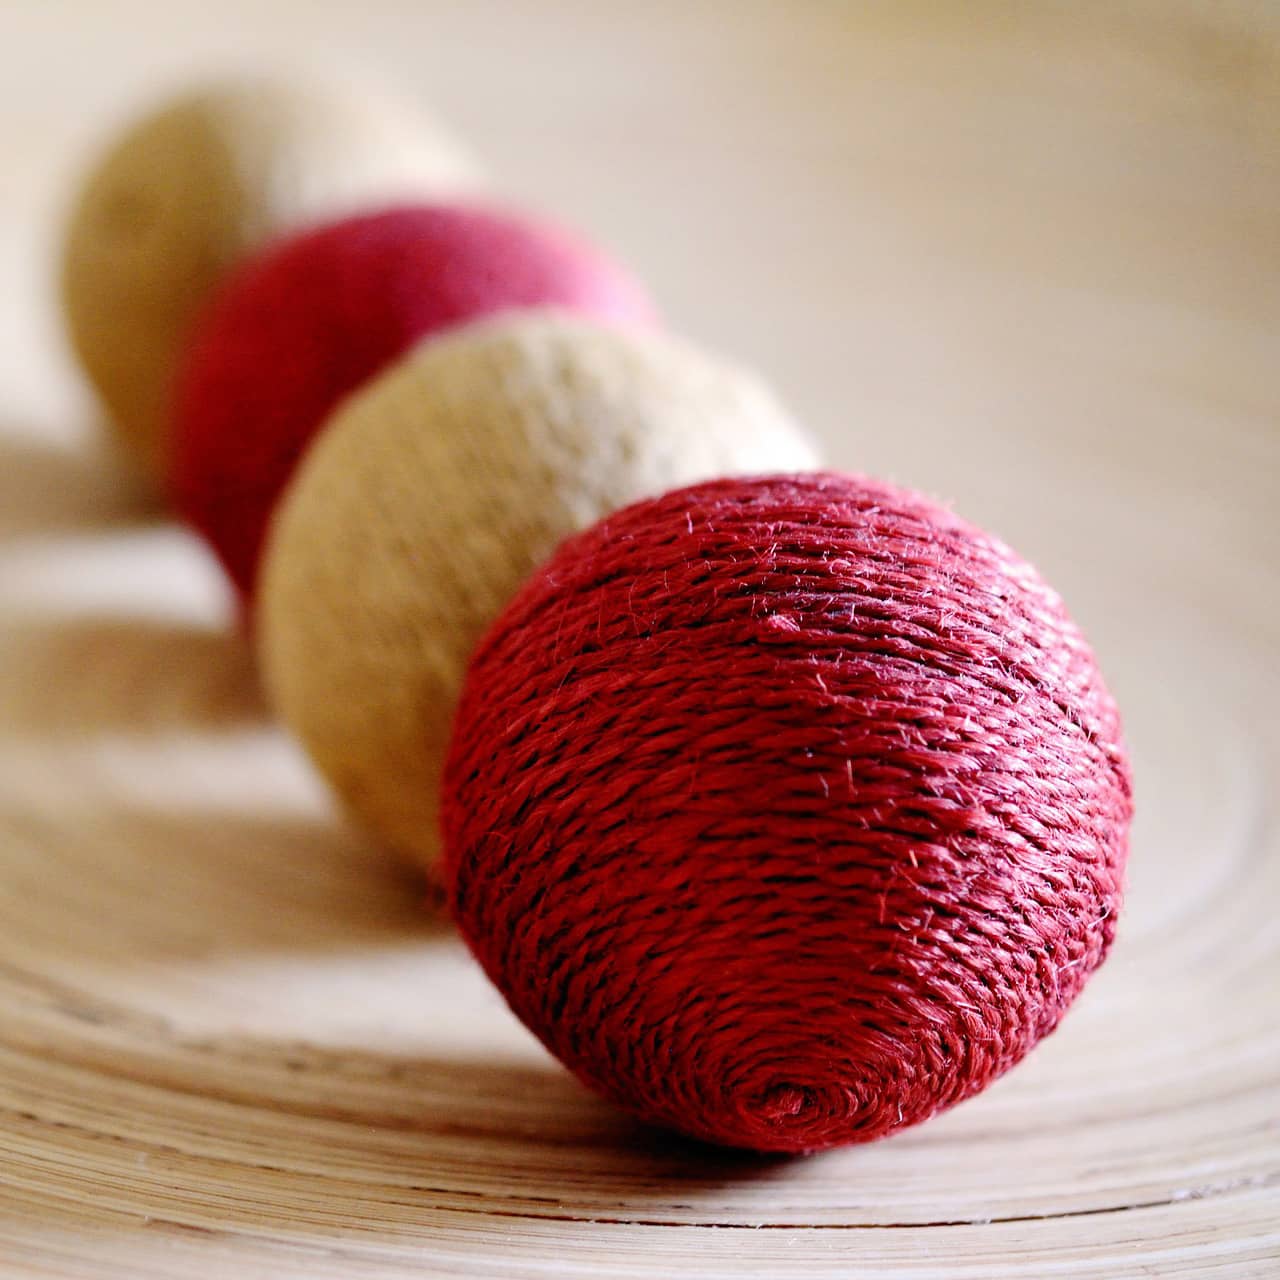
3. Yarn-wrapped Christmas balls
For a warm and homey look, yarn-wrapped ornaments are perfect. They add texture to your tree and can be customized to fit your color scheme.
What You’ll Need:
- Foam or plastic balls
- Yarn (in your preferred color)
- Hot glue
- Ribbon for hanging
How to Make Them:
- Take a foam or plastic ball and apply a dab of glue at the top.
- Start wrapping the yarn around the ball, making sure it’s snug.
- Continue wrapping until the ball is fully covered.
- Secure the end with glue, and add a loop of ribbon for hanging.
Crochet Yarn Bulb Ornaments | The Tash Life

Foam balls

Yarns
Christmas ribbon
DIY yarn-wrapped Christmas balls
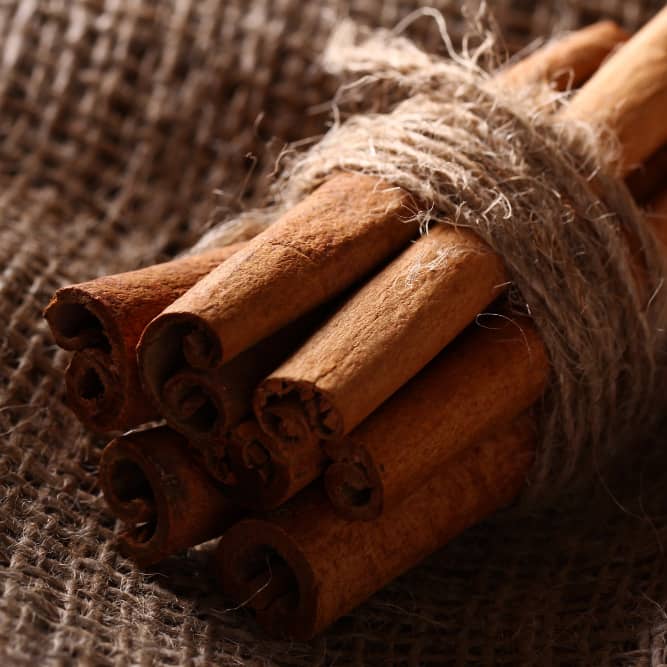
4. Dried orange slices
For a natural, eco-friendly decoration with a pop of color, dried orange slices are a beautiful option. They bring a rustic feel to your tree and smell amazing!
What You’ll Need:
- Fresh oranges
- Twine or ribbon
- Optional: cinnamon sticks or star anise for added scent and style
How to Make Them:
- Preheat your oven to 200°F.
- Slice oranges into thin rounds (about ¼ inch thick).
- Lay the slices on a baking sheet lined with parchment paper and bake for 2-3 hours, flipping them halfway through.
- Once dry, thread a piece of twine or ribbon through each slice.
- You can add cinnamon sticks or star anise to give it that extra holiday touch.
How to make dried oranges for Christmas decorations | The Sweetest Journey

Dried oranges
Cinnamon stick
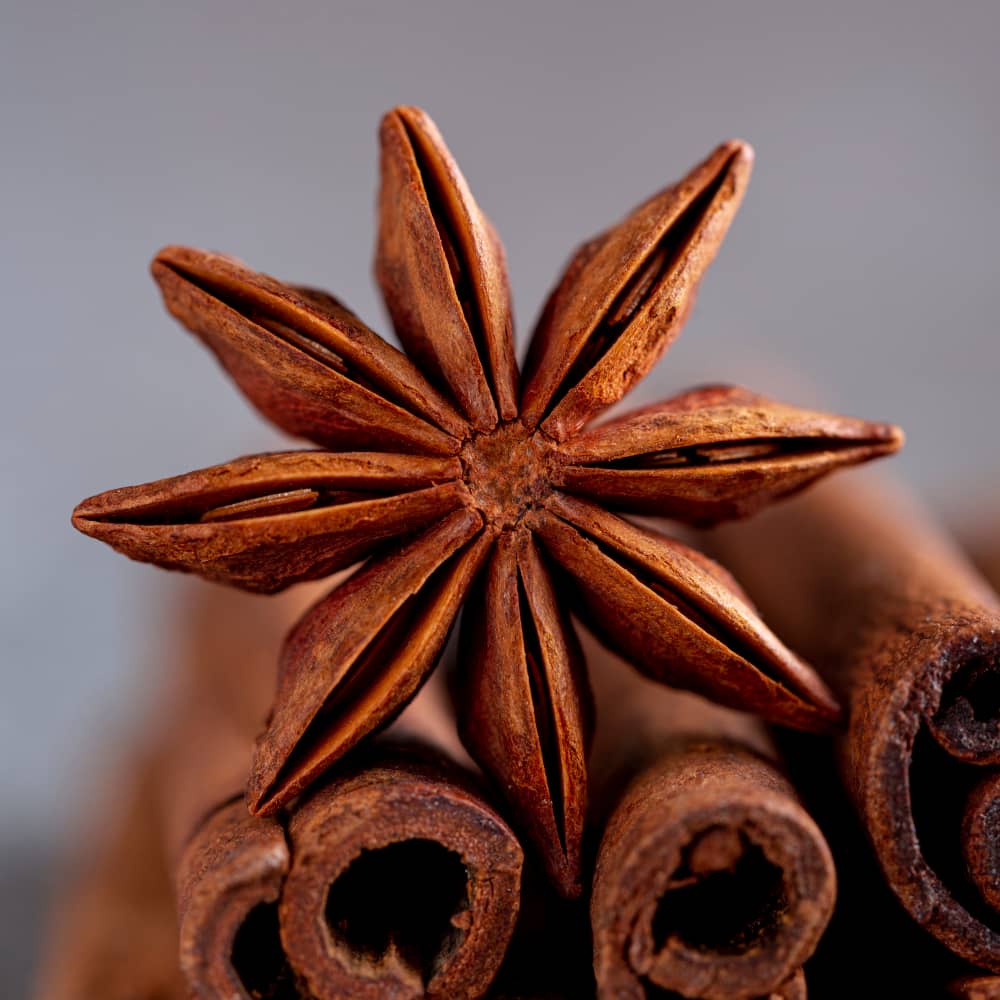
Star anise

Dried orange slices
5. Felt Christmas characters
These felt ornaments are all about fun and entertainment! Whether you make Santa, snowmen, or reindeer, they’re perfect for kids or anyone looking to add a playful touch to their tree.
What You’ll Need:
- Felt sheets (in different colors)
- Scissors
- Glue or needle and thread
- Stuffing (optional)
- Buttons, beads, or other small decorations
How to Make Them:
- Cut out shapes for your character—think snowmen, Santa, or gingerbread men.
- Glue or sew the pieces together, and add some stuffing for a 3D effect.
- Decorate with buttons, beads, or whatever embellishments you like.
- Attach a ribbon at the top for hanging.
DIY Felt Christmas Ornaments | The Crafting Nook
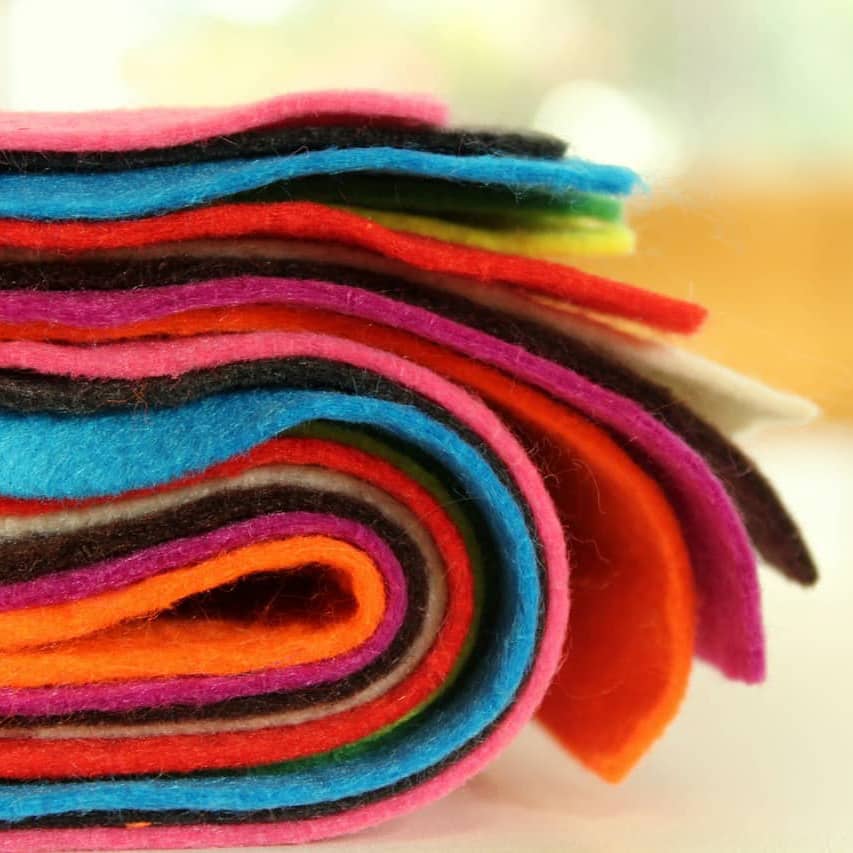
Colorful Felt

Beads

Buttons

Felt Christmas tree
6. Mason jar lid wreaths
These mason jar lid wreaths mix rustic charm with a glamorous touch. These mini wreaths are perfect if you want to add a touch of greenery to your tree and customized them to fit any color scheme.
What You’ll Need:
- Mason jar lids
- Twine or ribbon
- Mini pine sprigs or holly
- Hot glue
- Tiny decorations like berries or bells
How to Make Them:
- Wrap twine or ribbon around the mason jar lid until it’s fully covered.
- Hot glue a small piece of greenery on one side.
- Add a few tiny decorations like mini bells or berries to dress it up.
- Loop some ribbon through the top for hanging.
Mason Canning Jar Ring Wreath Ornament Tutorial | CookingAndCrafting

Mason Jar Lids
Yarn
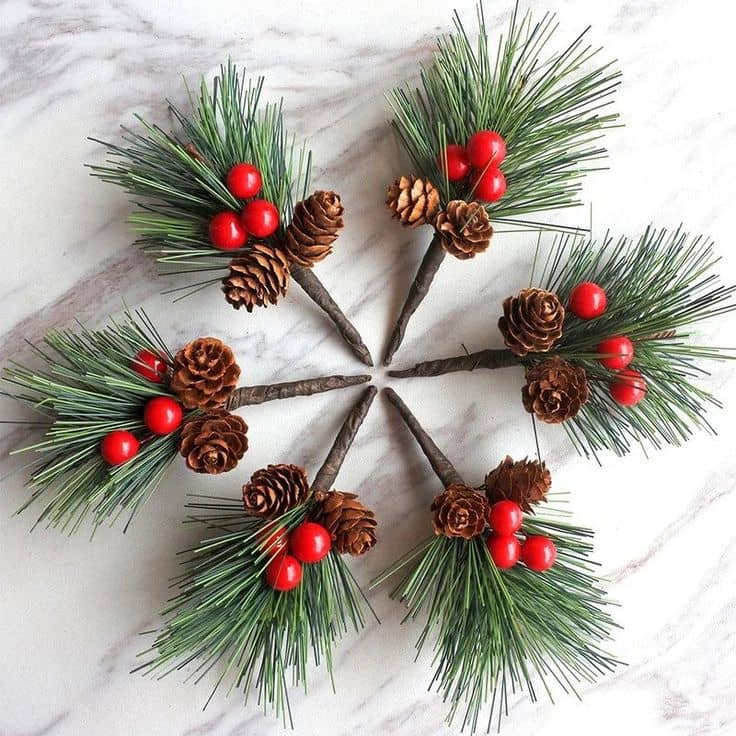
Berries or Pinecones
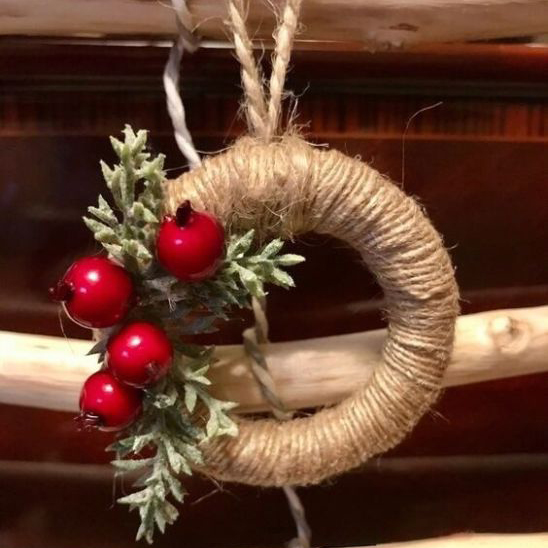
Mason jar lid wreaths
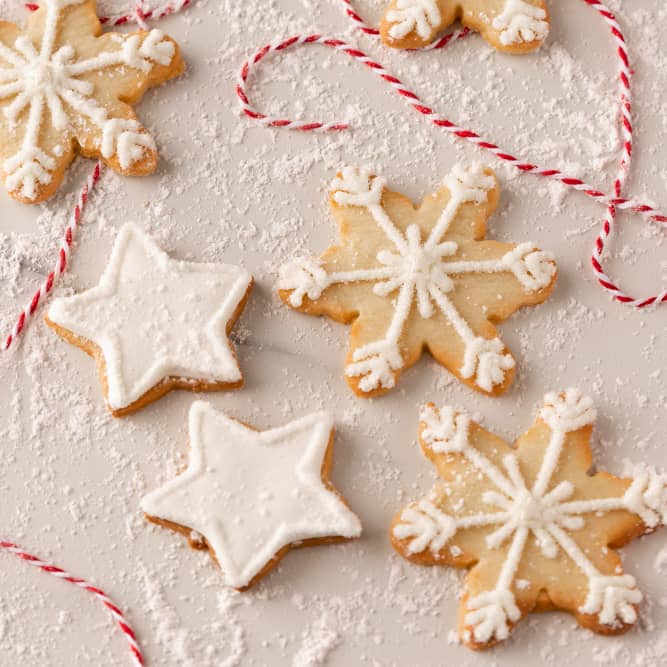
7. Salt dough ornaments
Salt dough ornaments are a timeless DIY project. They’re super easy to make, and the best part is you can customize them with paint or glitter to match your decor.
What You’ll Need:
- 1 cup flour
- ½ cup salt
- ½ cup water
- Cookie cutters
- Acrylic paint
- Ribbon for hanging
How to Make Them:
- Mix the flour, salt, and water together until it forms a dough.
- Roll it out to about ¼ inch thickness and cut out shapes with cookie cutters.
- Use a straw to poke a small hole at the top for hanging.
- Bake at 200°F for 2-3 hours, then let cool.
- Paint and decorate however you like, and finish with a ribbon for hanging.
How to make salt dough ornaments | Dovie
Flour for DIY dough ornaments

Salt for DIY dough ornaments
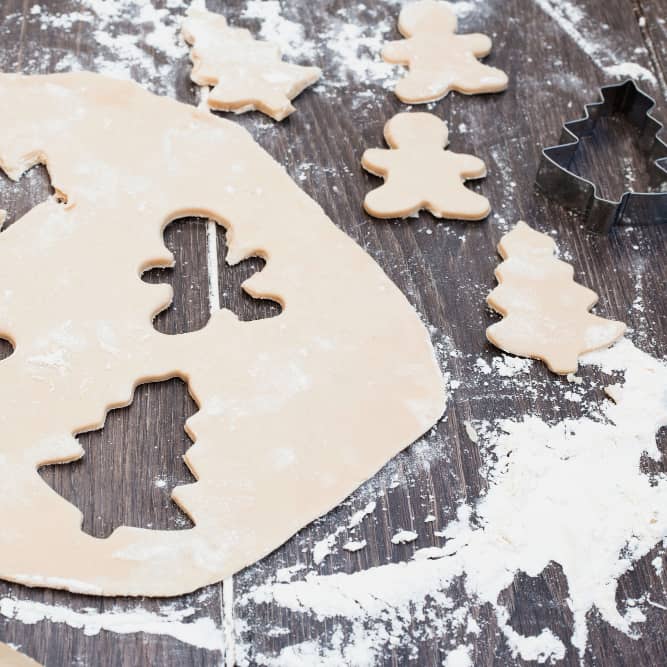
Cookie cutter for DIY dough ornaments
DIY salt dough ornaments
8. Mini twig stars
For a simple, natural decoration, twig stars are perfect. They bring a little outdoor charm inside and are great for a minimal, rustic tree.
What You’ll Need:
- Twigs (collected from your yard)
- Twine or glue
- Ribbon or string for hanging
How to Make Them:
- Collect some small twigs and break them into even lengths.
- Arrange them in a star shape, gluing or tying them together at the joints with twine.
- Once the glue dries, add a loop of twine or string to the top for hanging.
Budget-free twig star for Christmas tree decoration | Carter Sams
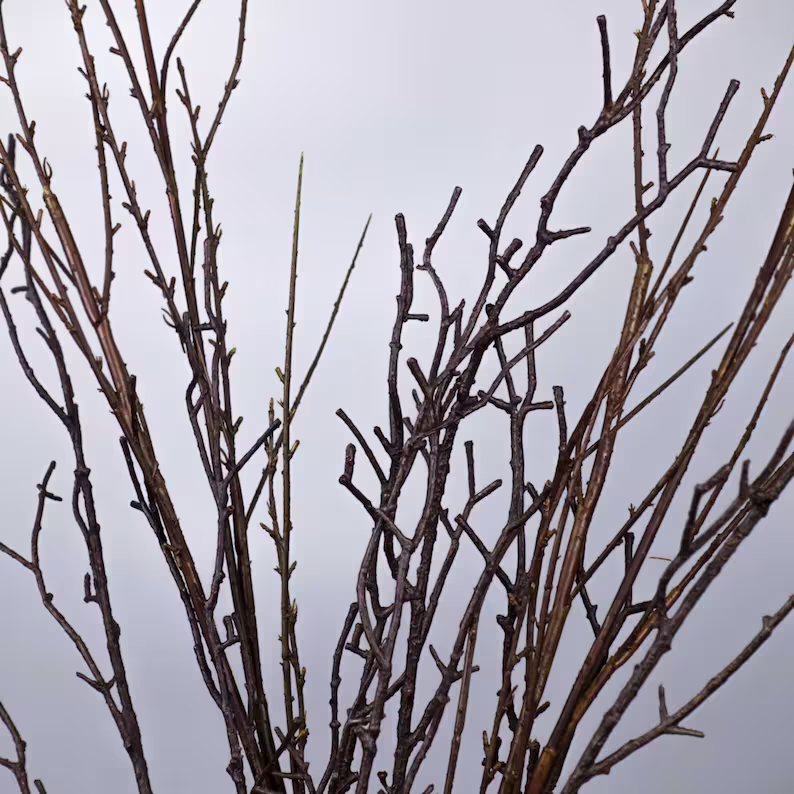
Twigs
Yarn
Christmas ribbon

Christmas twig stars
9. Button Christmas trees
If you’ve got a jar of old buttons lying around, put them to good use by making button Christmas trees! These quirky, vintage-inspired ornaments are easy and fun to create.
What You’ll Need:
- Buttons in various sizes
- Wire or string
- Beads (optional)
How to Make Them:
- Start by threading your buttons onto a piece of wire or string, from largest to smallest to form the shape of a Christmas tree.
- Add a small bead at the top as a tree topper.
- Tie the ends together and add a loop of string for hanging.
Button Christmas tree decoration | Christine’s Crafts
Buttons
glitter
Yarn or string
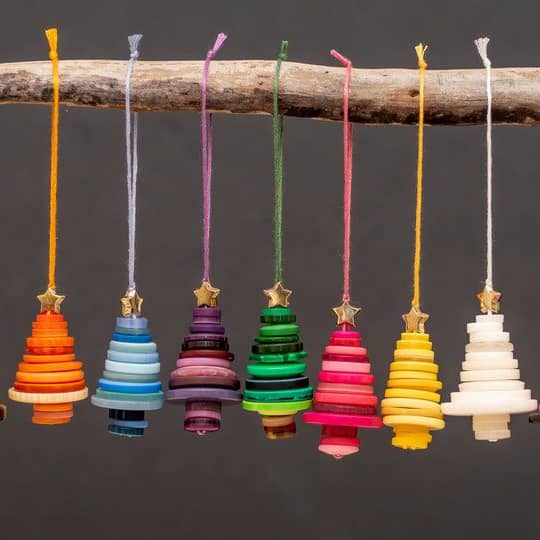
Button Christmas tree
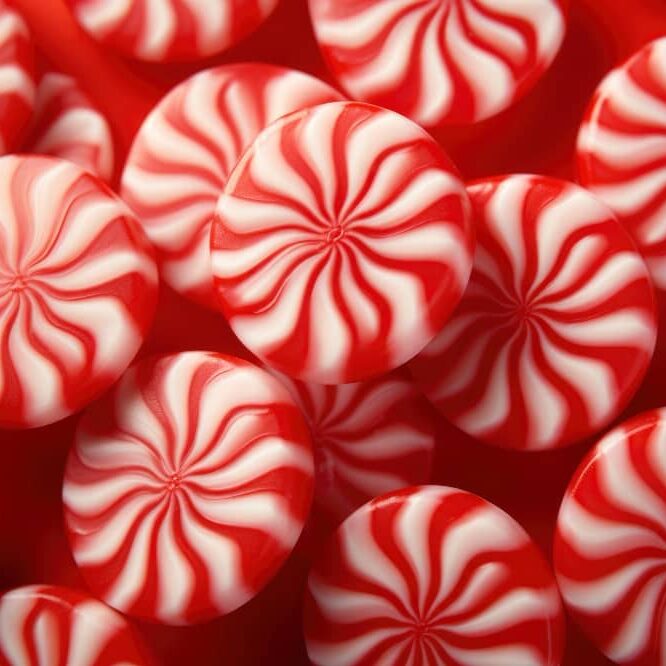
10. Peppermint candy ornaments
Peppermint candy ornaments are sweet and colorful decorations made by melting peppermint candies into various shapes, creating eye-catching pieces for your tree.
Materials:
- Peppermint candies
- Parchment paper
- Ribbon
Instructions:
- Arrange peppermint candies in desired shapes on parchment paper.
- Bake at 300°F (150°C) for 10 minutes until melted.
- Let cool completely and carefully remove from parchment paper.
- Attach a ribbon for hanging.
How to make pepprmin candy ornament | koacampgrounds
Peppermint candies

Parchment paper

Ribbon

Peppermint candies
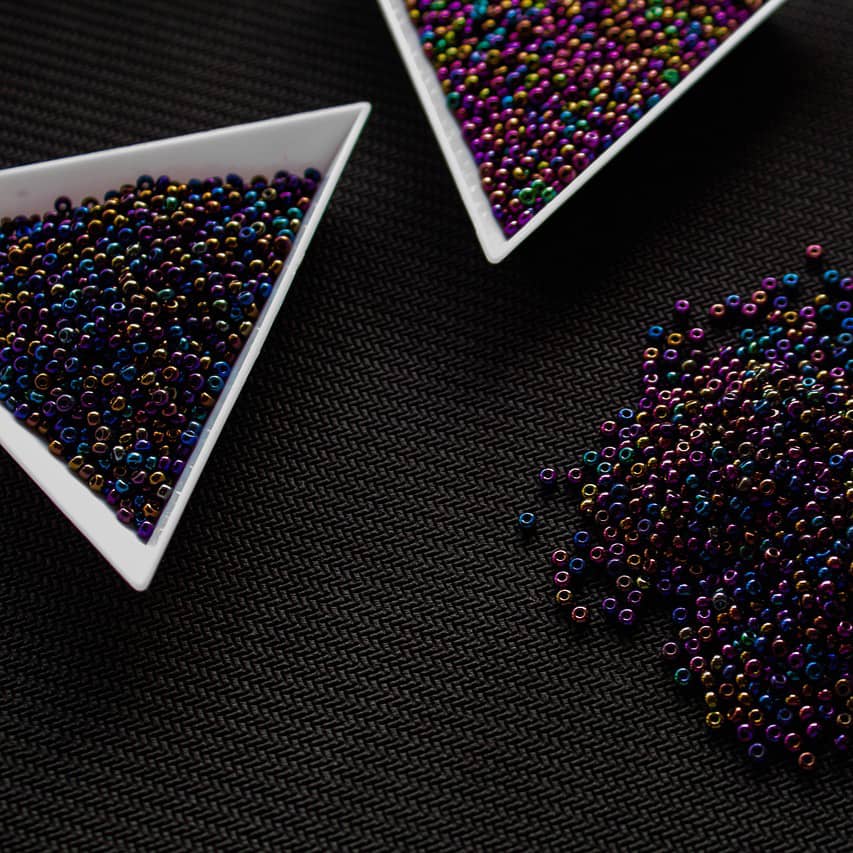
11. Beaded snowflakes
For a touch of sparkle, beaded snowflakes are the perfect DIY Christmas tree decoration. They look intricate but are surprisingly easy to make!
What You’ll Need:
- Thin wire
- Assorted beads
- Ribbon or fishing line for hanging
How to Make Them:
- Cut several pieces of wire and twist them together at the center to create a snowflake shape.
- Slide beads onto each arm of the snowflake, alternating colors or shapes for variety.
- Twist the ends of the wire to secure the beads in place.
- Add a ribbon or fishing line for hanging.
Beaded snowflake for Christmas tree | beadaholique

Beaded snowflake wire
Beads
Christmas ribbon

Beaded snowflake
12. Paper snowflakes
Paper snowflakes are classic, simple decorations that you can hang in windows or around the house. Each one is unique, just like real snowflakes.
Materials:
- White paper
- Scissors
Instructions:
- Fold a square piece of paper diagonally to make a triangle.
- Fold the triangle in half twice more.
- Cut out various shapes along the edges.
- Unfold the paper to reveal your snowflake.
Paper snowflakes | wonder crafts
These homemade Christmas tree decorations are a wonderful way to bring personality, warmth, and a sense of tradition to your holiday season. there are countless ways to infuse your space with festive cheer. Here are some Christmas decoration ideas to help you create a magical atmosphere for the holidays. Best of all, they’re fun to make, whether you’re crafting solo or with friends and family. Happy decorating!